Set-Up Mailbox
The following guide will show you how to add or edit Atollon Mailbox.
Open Mailbox Settings
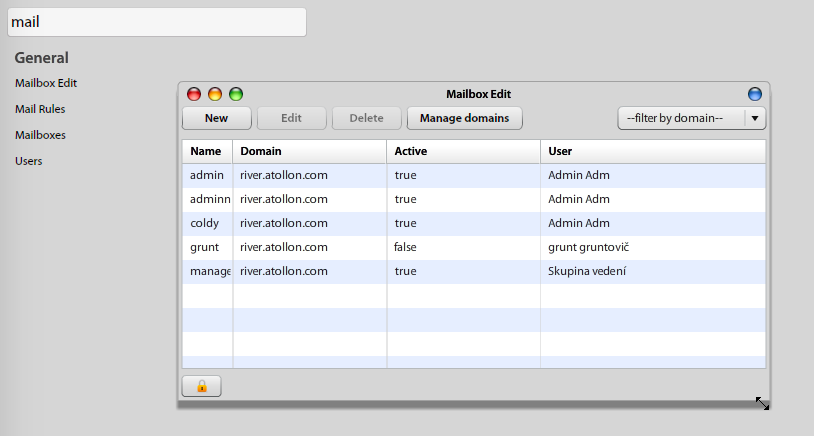
Open Options & Tools > and search for Mailbox Edit tool.
Create New Mailbox
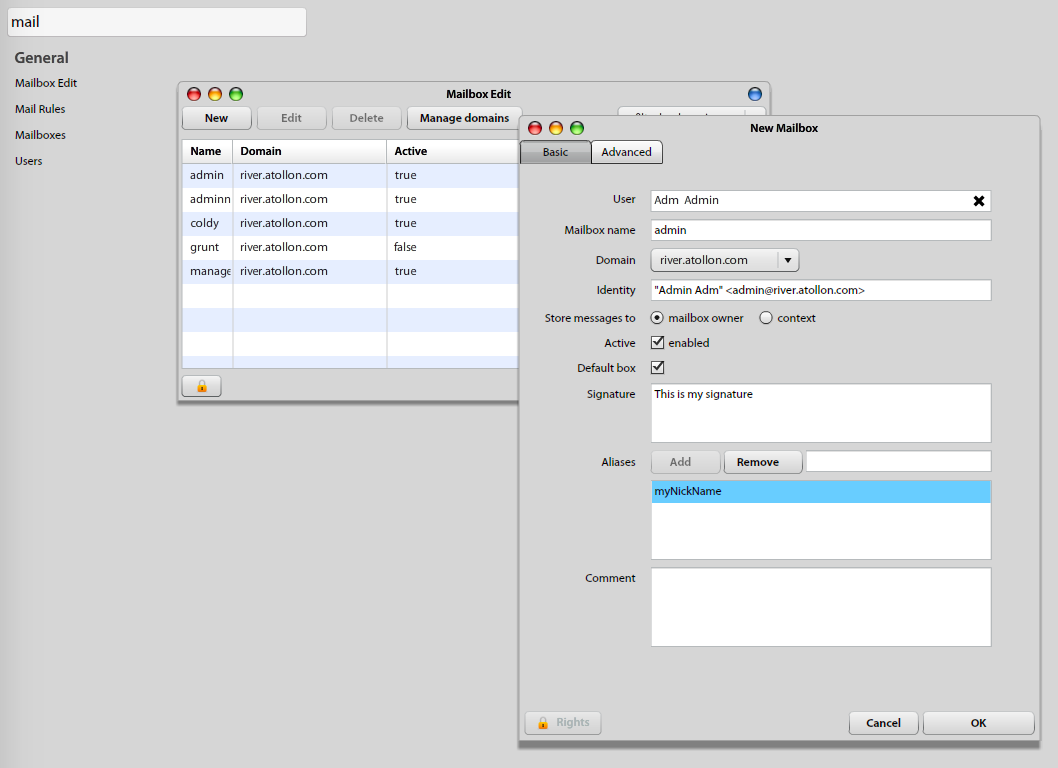
First, select the user, who will be the owner of the mailbox. Each user may have several mailboxes at the same time. One mailbox is always primary (used first when sending new e-mail from Atollon).
Edit Mailbox Settings
There are the following Mailbox options that you should fill-in:
- E-mail name is the identification of Mailbox in the system and primary Mailbox name in the same time. This is the part that will be before "@".
- Domain is the mail server identification. This is the part that will be after"@".
- Identity is the default Mailbox owner's identity, when sending e-mails. Be careful, when changing this field and keep suggested syntax emailName@domain.
- Store messages to: you have option either to distribute new e-mail to user's individual message folder (To Do) or select any folder or project from contexts.
- Active (Yes/No): indicates whether Atollon receives mail on this address or not.
- Default box (Yes/No): indicates, whether this Mailbox is used first when sending new E-mail by the owner.
- Signature: fill-in owner's signature.
- Aliases: you can add more names to this Mailbox. Please note that Alias must not have the same name as some other existing Mailbox. Aliases are used only for receiving emails. You need to create new mailbox if you want to send mails with some other name. Aliases are always in same domain as the mailbox they are specified in. Do not write "@domain" part here.
Mailbox Advanced Options
- Auto - respond settings = it allows you to enable and set up automatic response when out-of office or unavailable
- Forward settings = it allows you to enable automatic forwarding of incoming e-mails (Allow forwarding), where you can choose Save forwarded option (all incoming messages will by saved in your mailbox, otherwise forwarded only); finally you can set up/ manage forward e-mail addresses.
Mailbox Access Rights
In Mailbox detail: Bottom left you may find access rights to each individual mailbox. Each user must have View & Edit rights to their mailbox in order to be able to:
- Use the mailbox
- Edit own signature in Mailbox Settings.
To set up user rights just push the Add User button and select the name of mailbox owner from the list, select appropriate user rights and commit changes by pushing Save button.
After you are ready, press Ok to save your mailbox settings. If Domain MX records are properly set, you should soon be able to receive new Mail.
Next Step:
If you have not done so, set-up your Domain MX records.