Project Type Settings
This guide will take you through creating new Project Type, the entity allowing you to track part of Business Processes.
Video Tutorial on Project Types Settings
Create new Project Type
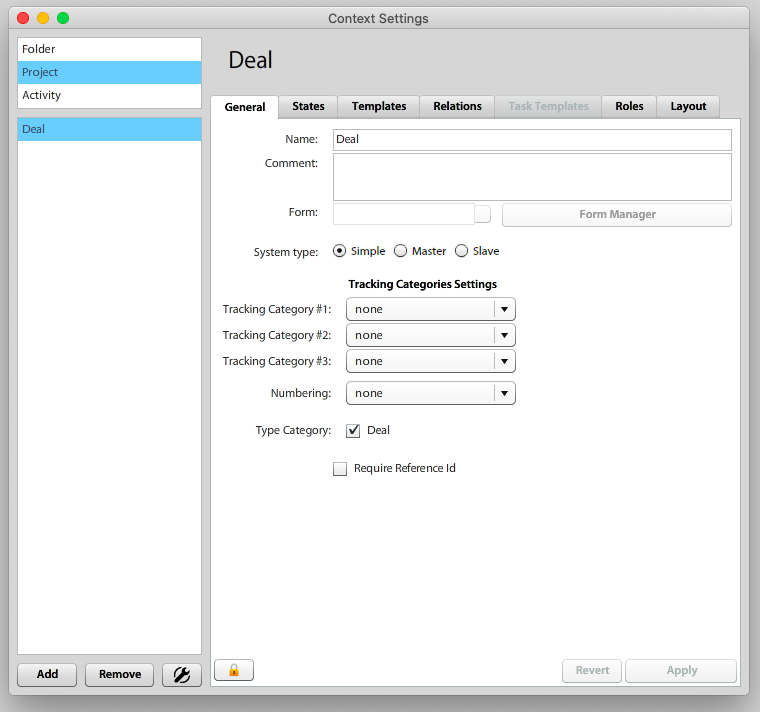
Open Options & Tools and browse to Context Settings. here, select Projects & click Add button to add new Project Type. Then it is necessary to change the Name field from New Type to your desired Project Type Name.
If the new Project Type is Master Project, you should check "Is Master Project Type".
If the new Project Type is Slave Project, you should check "Is Master Project Required".
Dimension Settings may add controlling variable to be optional or compulsory on the Project.
Assign one or more Custom States
Project custom states define project lifecycle from Initial, over In Progress to final Closed / Won / Lost.
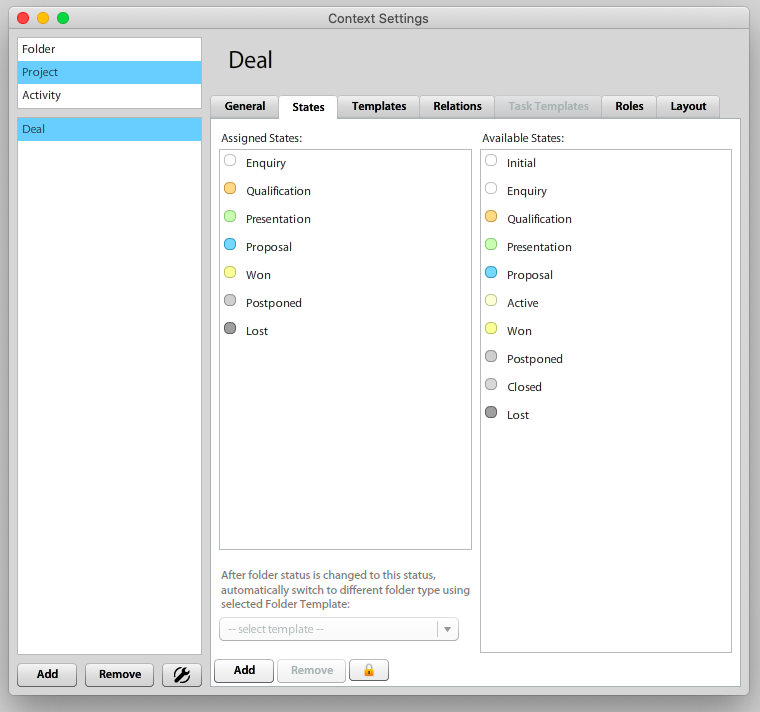
Drag & Drop records (Custom States) from Available States into Assigned States or vice-versa. This way you will set-up all the available Project states during it's life-cycle.
Create Project Template
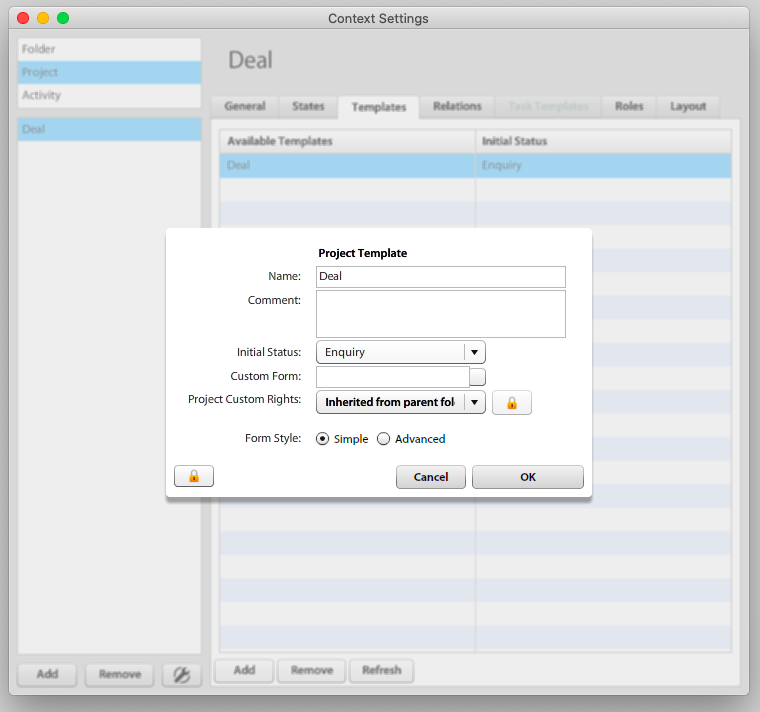
The Project Template is necessary in order to create at least one Project. All projects are created based on Project Templates. It is necessary also to set the Initial Status. Without the status, Project would not be visible in Finder.
Setting Provider helps to indicate, which entity (Account) will be set as Issuer on the Invoice generated in connection to the Project.
Setting Customer helps to indicate, which entity (Account) will be set as payer of the Invoice generated in connection to the Project, that means who will pay for the services in connection to the Project. This option is not typically used, you should change the Customer on each project individually, only once it is different from the Client (expecting that you create the new Project on Client's Contact Folder).
Setting Journal will indicate what numbering set will be used for New Invoice.
Add Activities / Milestones
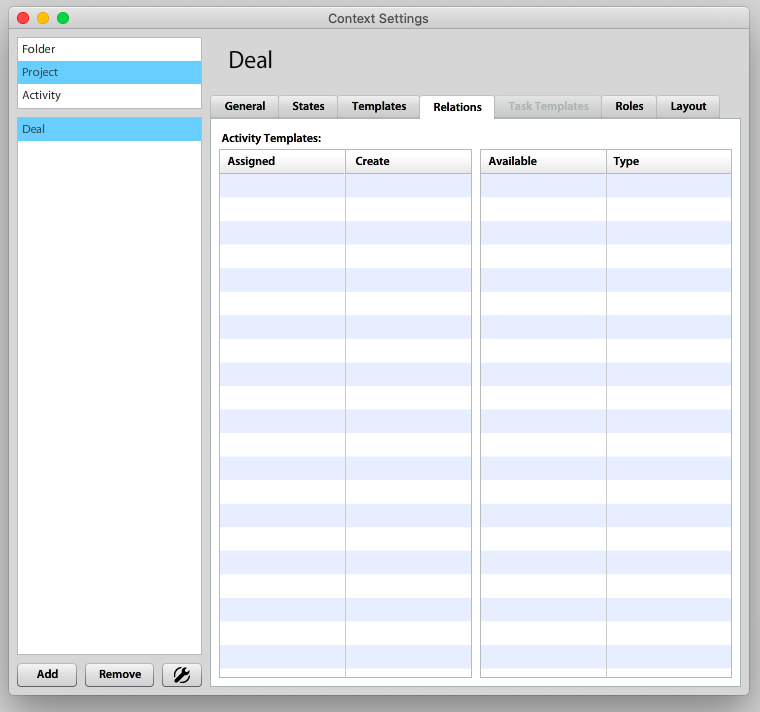
Relations Tab on Project Type detail is used to add one or more Activities / Milestones to be allowed for the Project. Activities and Project Milestones can further split Project into several phases, which may be solved and delivered individually. The reason for adding Activities / Milestones is mainly indicating partial status of each of the project deliveries. Activity may also hold all communication, tasks, time sheet, documents, custom form, etc.
Just drag & drop one of the available Activity Templates here.
If you set Create to Yes, the Activity will be created automatically.
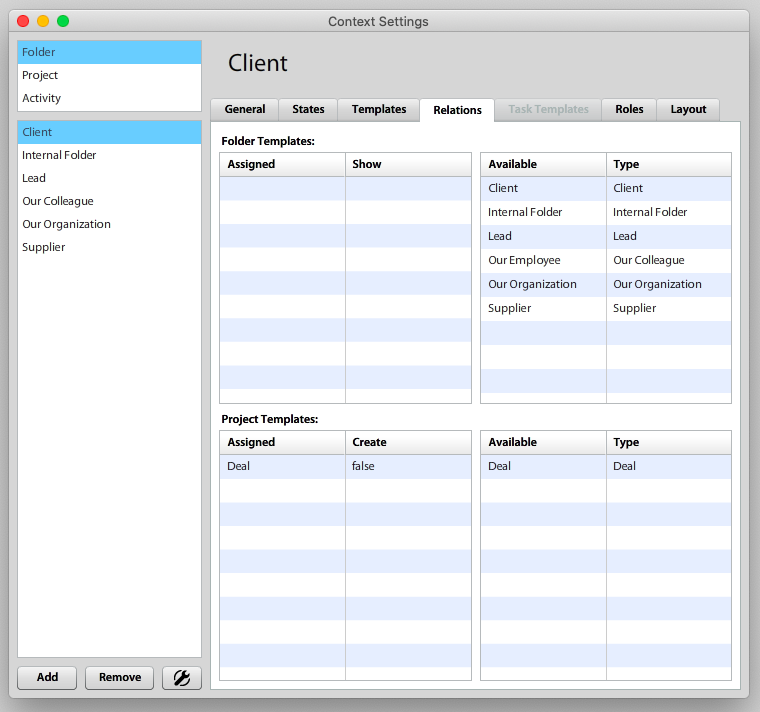
Allow Project to be created under Folder (of certain Type)
Add Custom Form to Project Type or Project Template
In order to assign Custom Form to Project, you may assign it to Project Type or Project Template (both may be used at the same time).
Custom Forms are administered using Atollon Win Client interface. Go to Settings > Account & Project > Account Types and follow the procedure:
- Select the new Project Type
- Press on Edit
- Click on Form (...) field
- Click / expand one of the Custom Form folders and press on New
- Write the Custom Form Name (may be the same as the Project Type Name)
- Press Ok
- Select the newly created Custom Form
- Press Ok
- Save the Project Type settings
In order to design the Custom Form fields, you may return to Custom Forms administration and design the form. Go to Settings > Form > Form Admin.
If you need to add / design new Custom Form also based on template, follow the same procedure as above, just edit the Project Template (not Project Type).
Add automated Project Numbering
In order to let Atollon add unique number to your new Project, follow the procedure below:
- Select the new Project Type
- Press Edit
- Click on Numbering (...) field
- Press on New icon (to create new Numbering Settings)
- Click on Serial (...) field
- Press on New icon (to create new Serial Counter)
- Write the descriptive name for Serial Counter ("Business Cases Serial" ... or there can be existing serial shared among more Project Types)
- Set what event will cause reset of the Serial Counter (always last number used is remembered)
- Press Ok
- Select the newly created Serial Counter and press Ok
- Add the Name, Number or digits in Serial field & write the Mask (ex.: "01"YYS will generate first number in 2011 year: 01110001)
- Press Ok
- Double click on newly created Numbering Settings
- Save Project Type
Access Rights
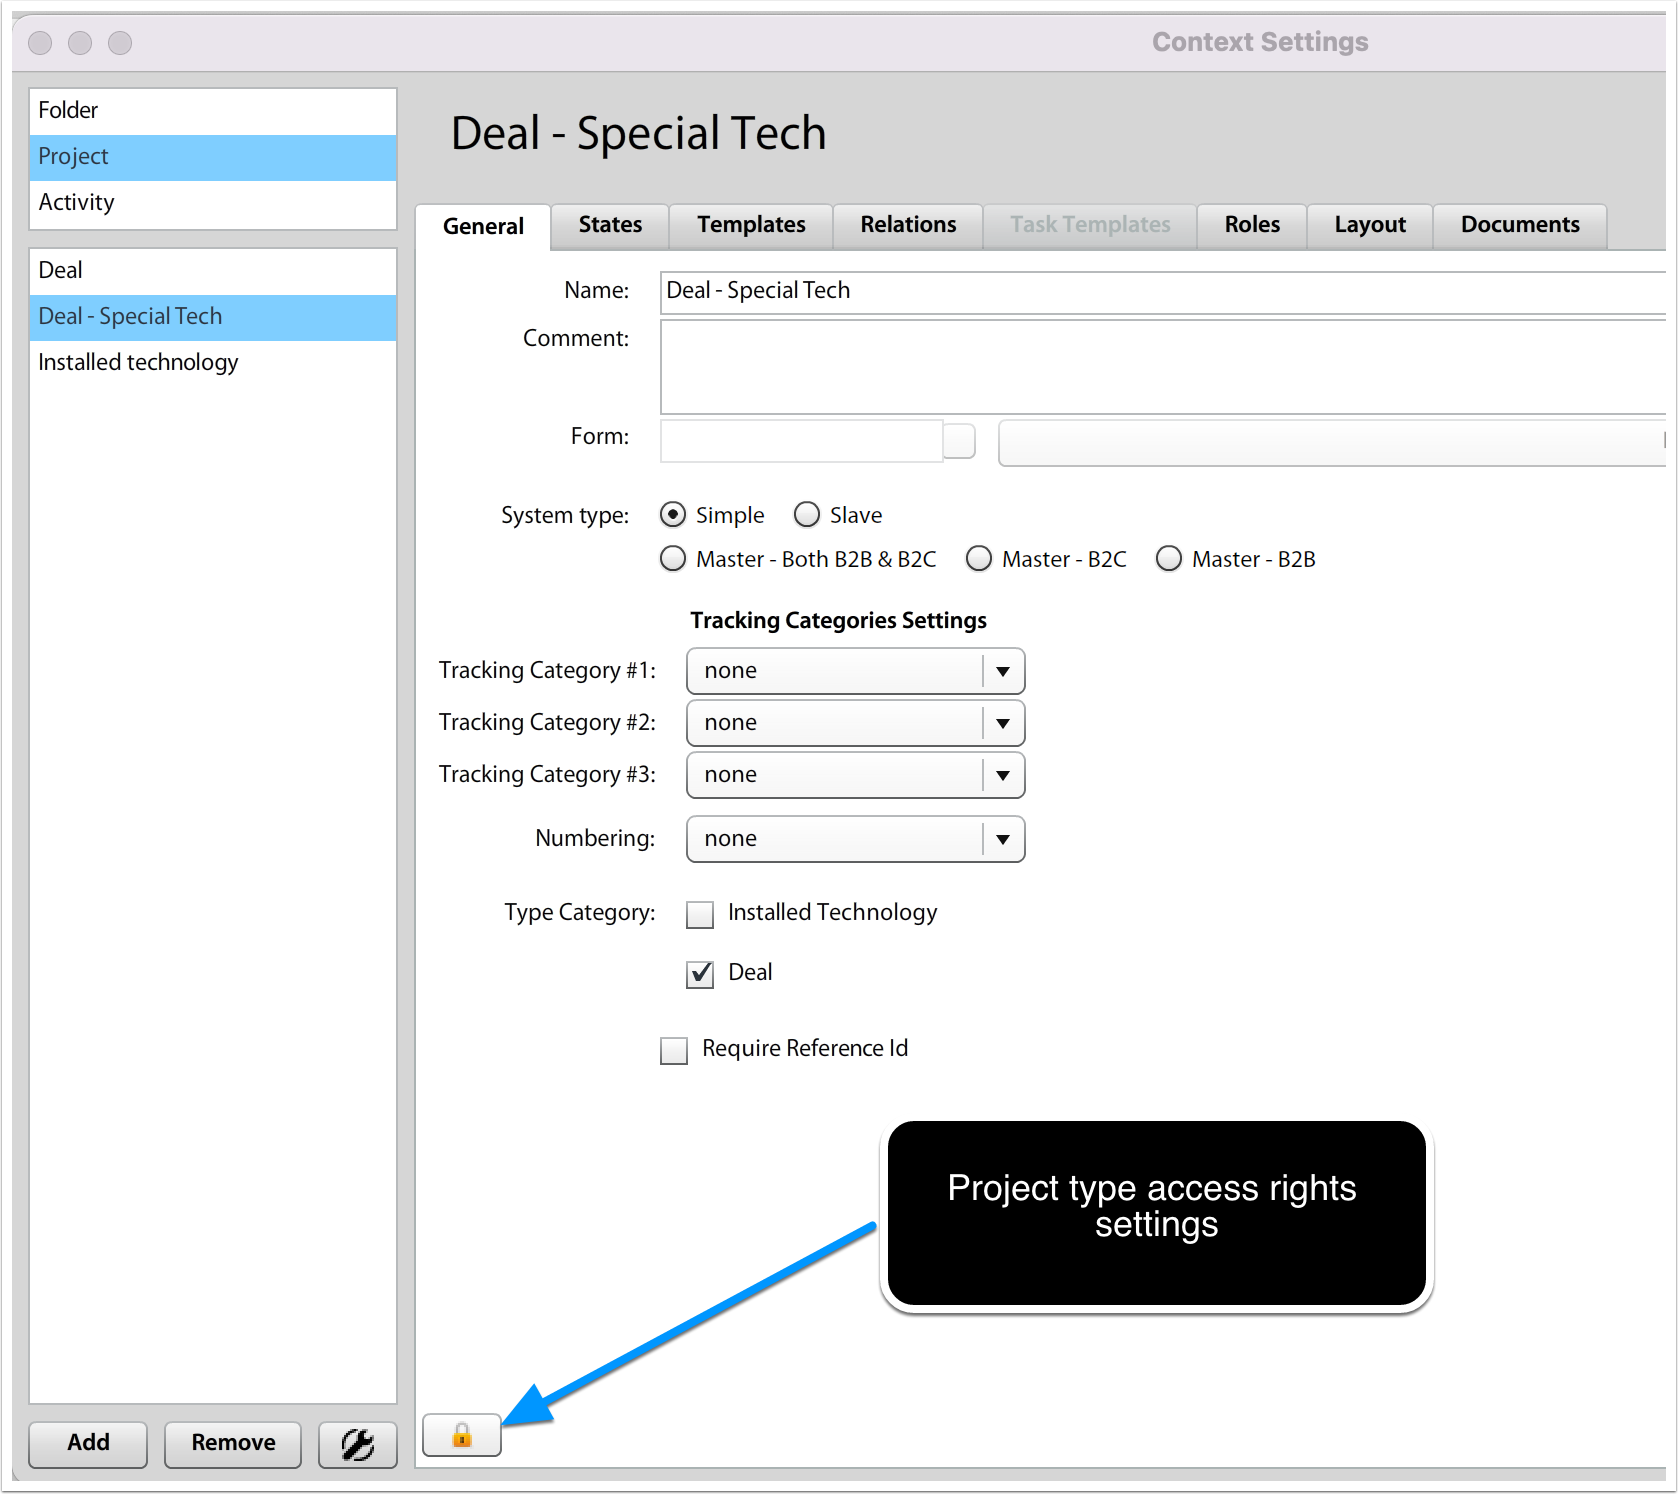
Limit rights on project type
Changing access rights on project type will influence rights of users on projects of this type.
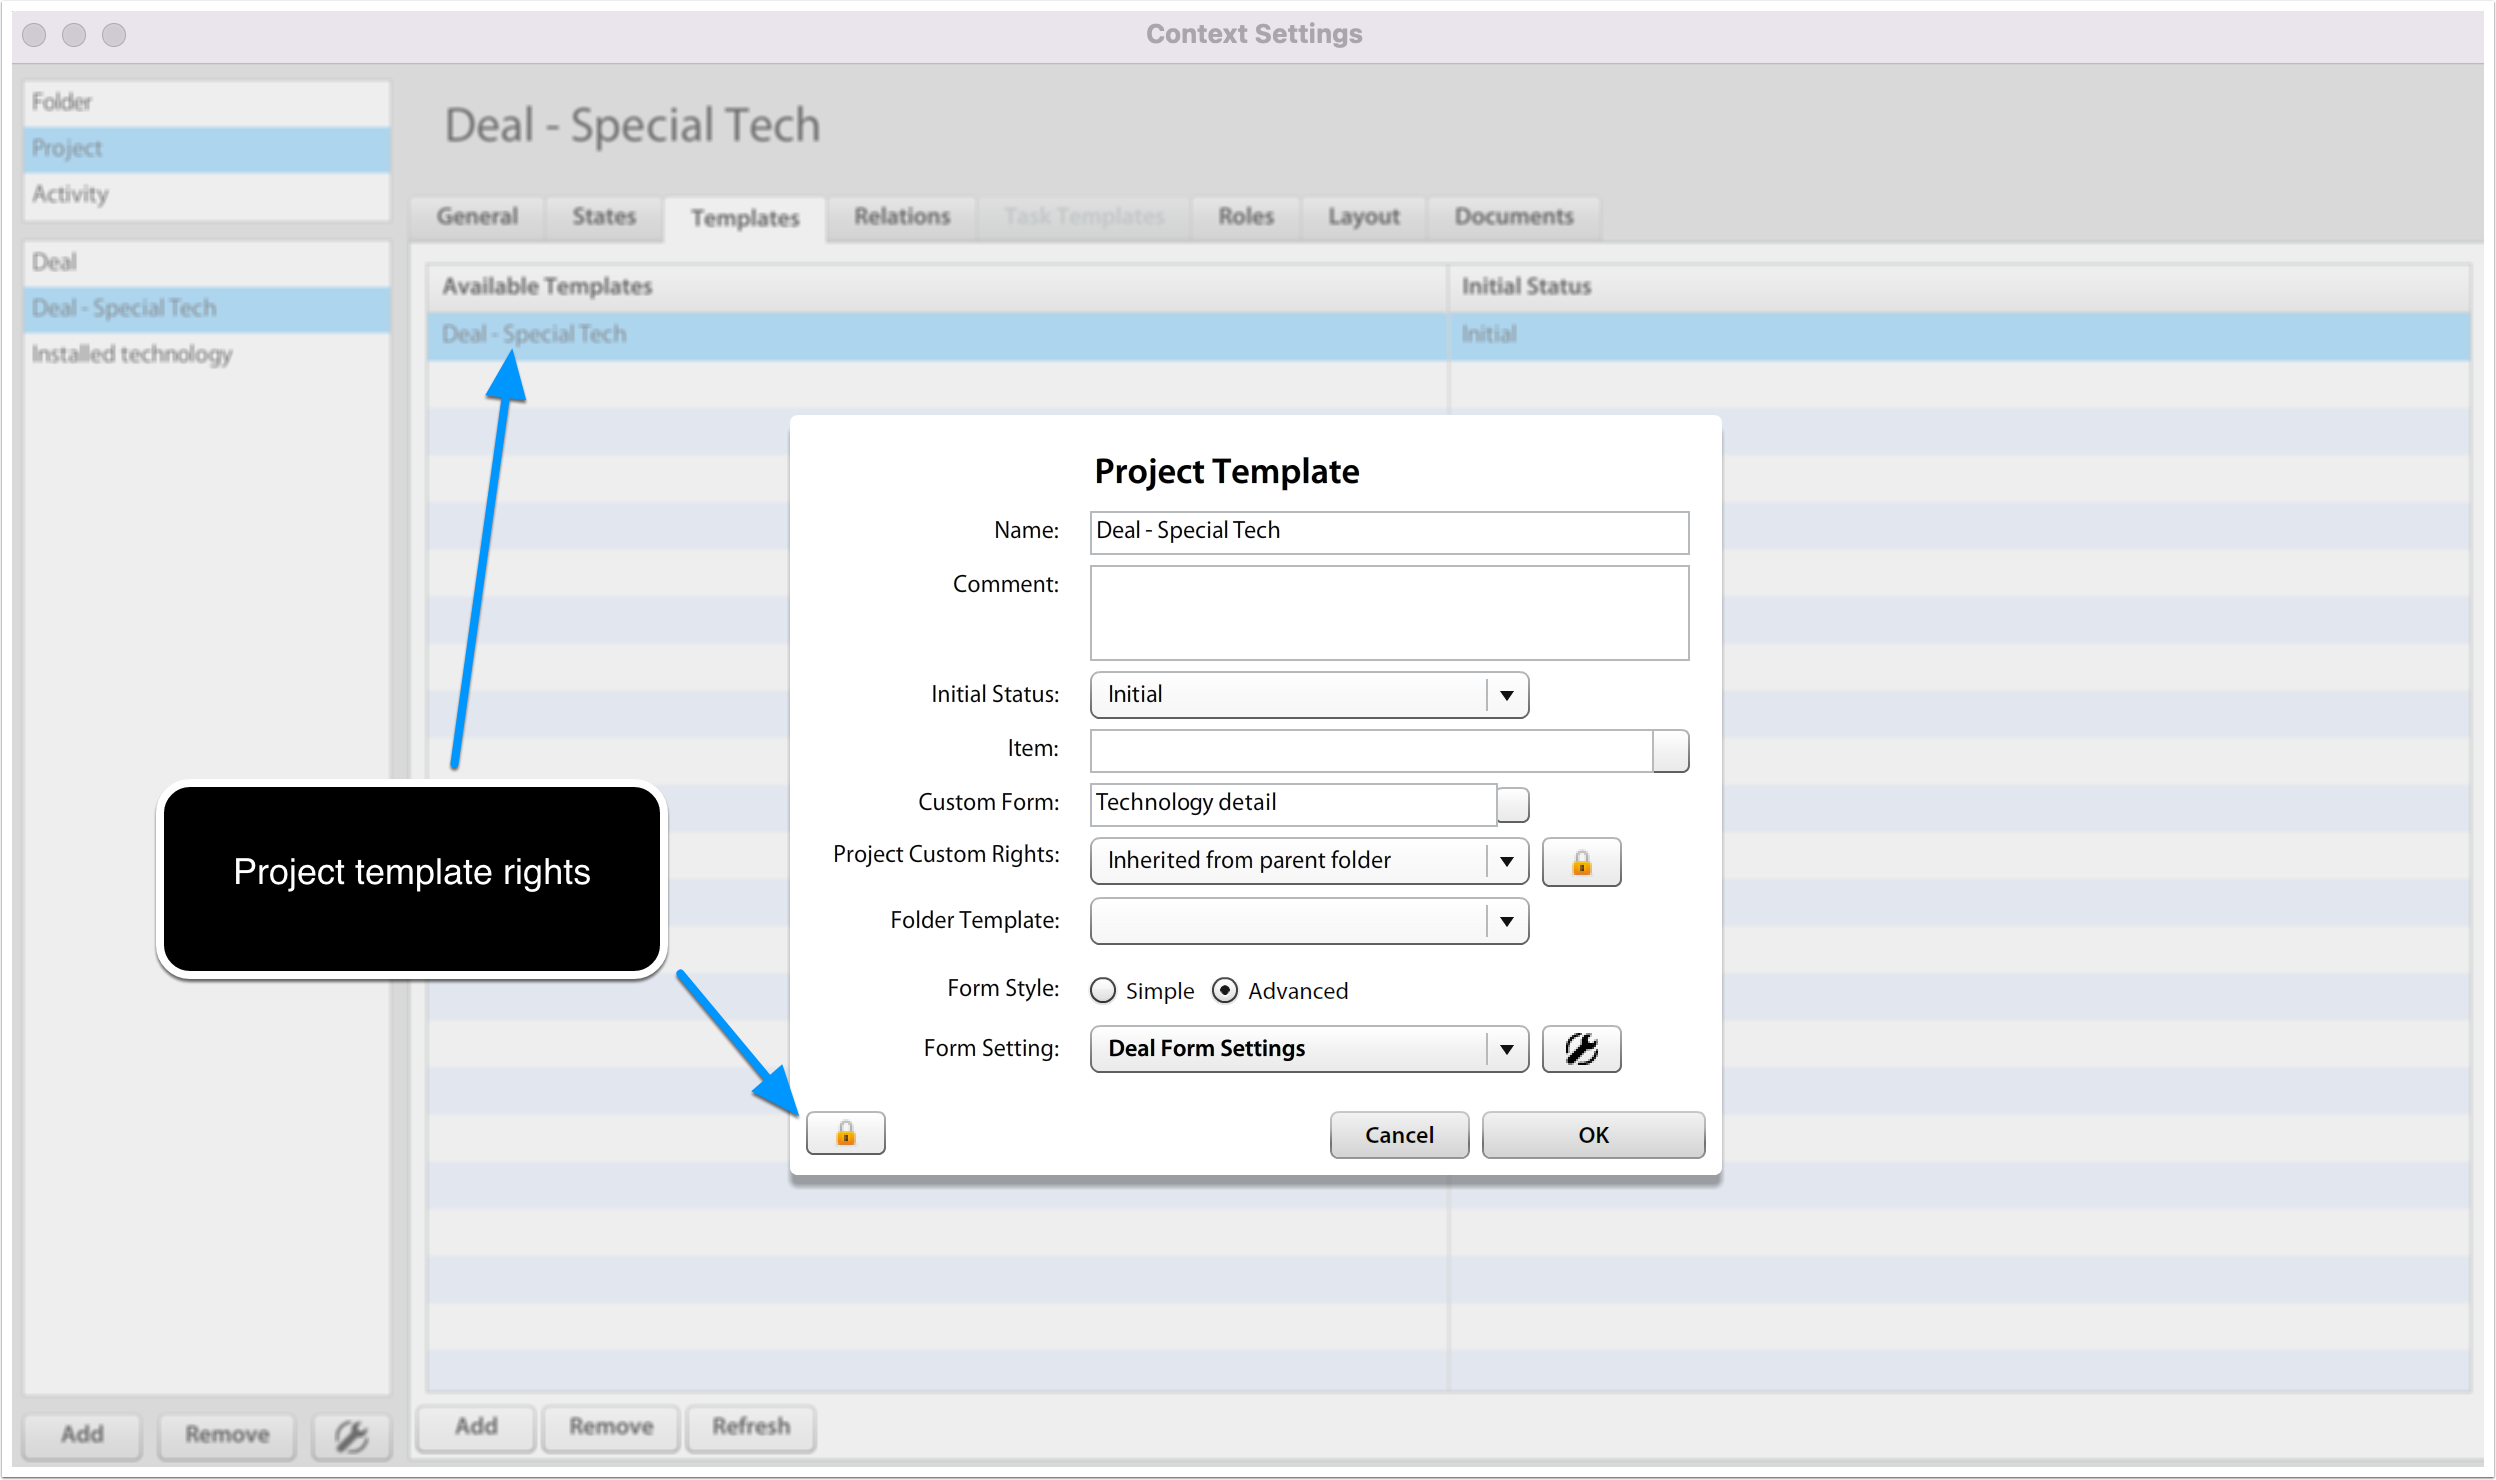
See the screenshot below, you may change rights to project type in Context > Project > select project type that you want to update.
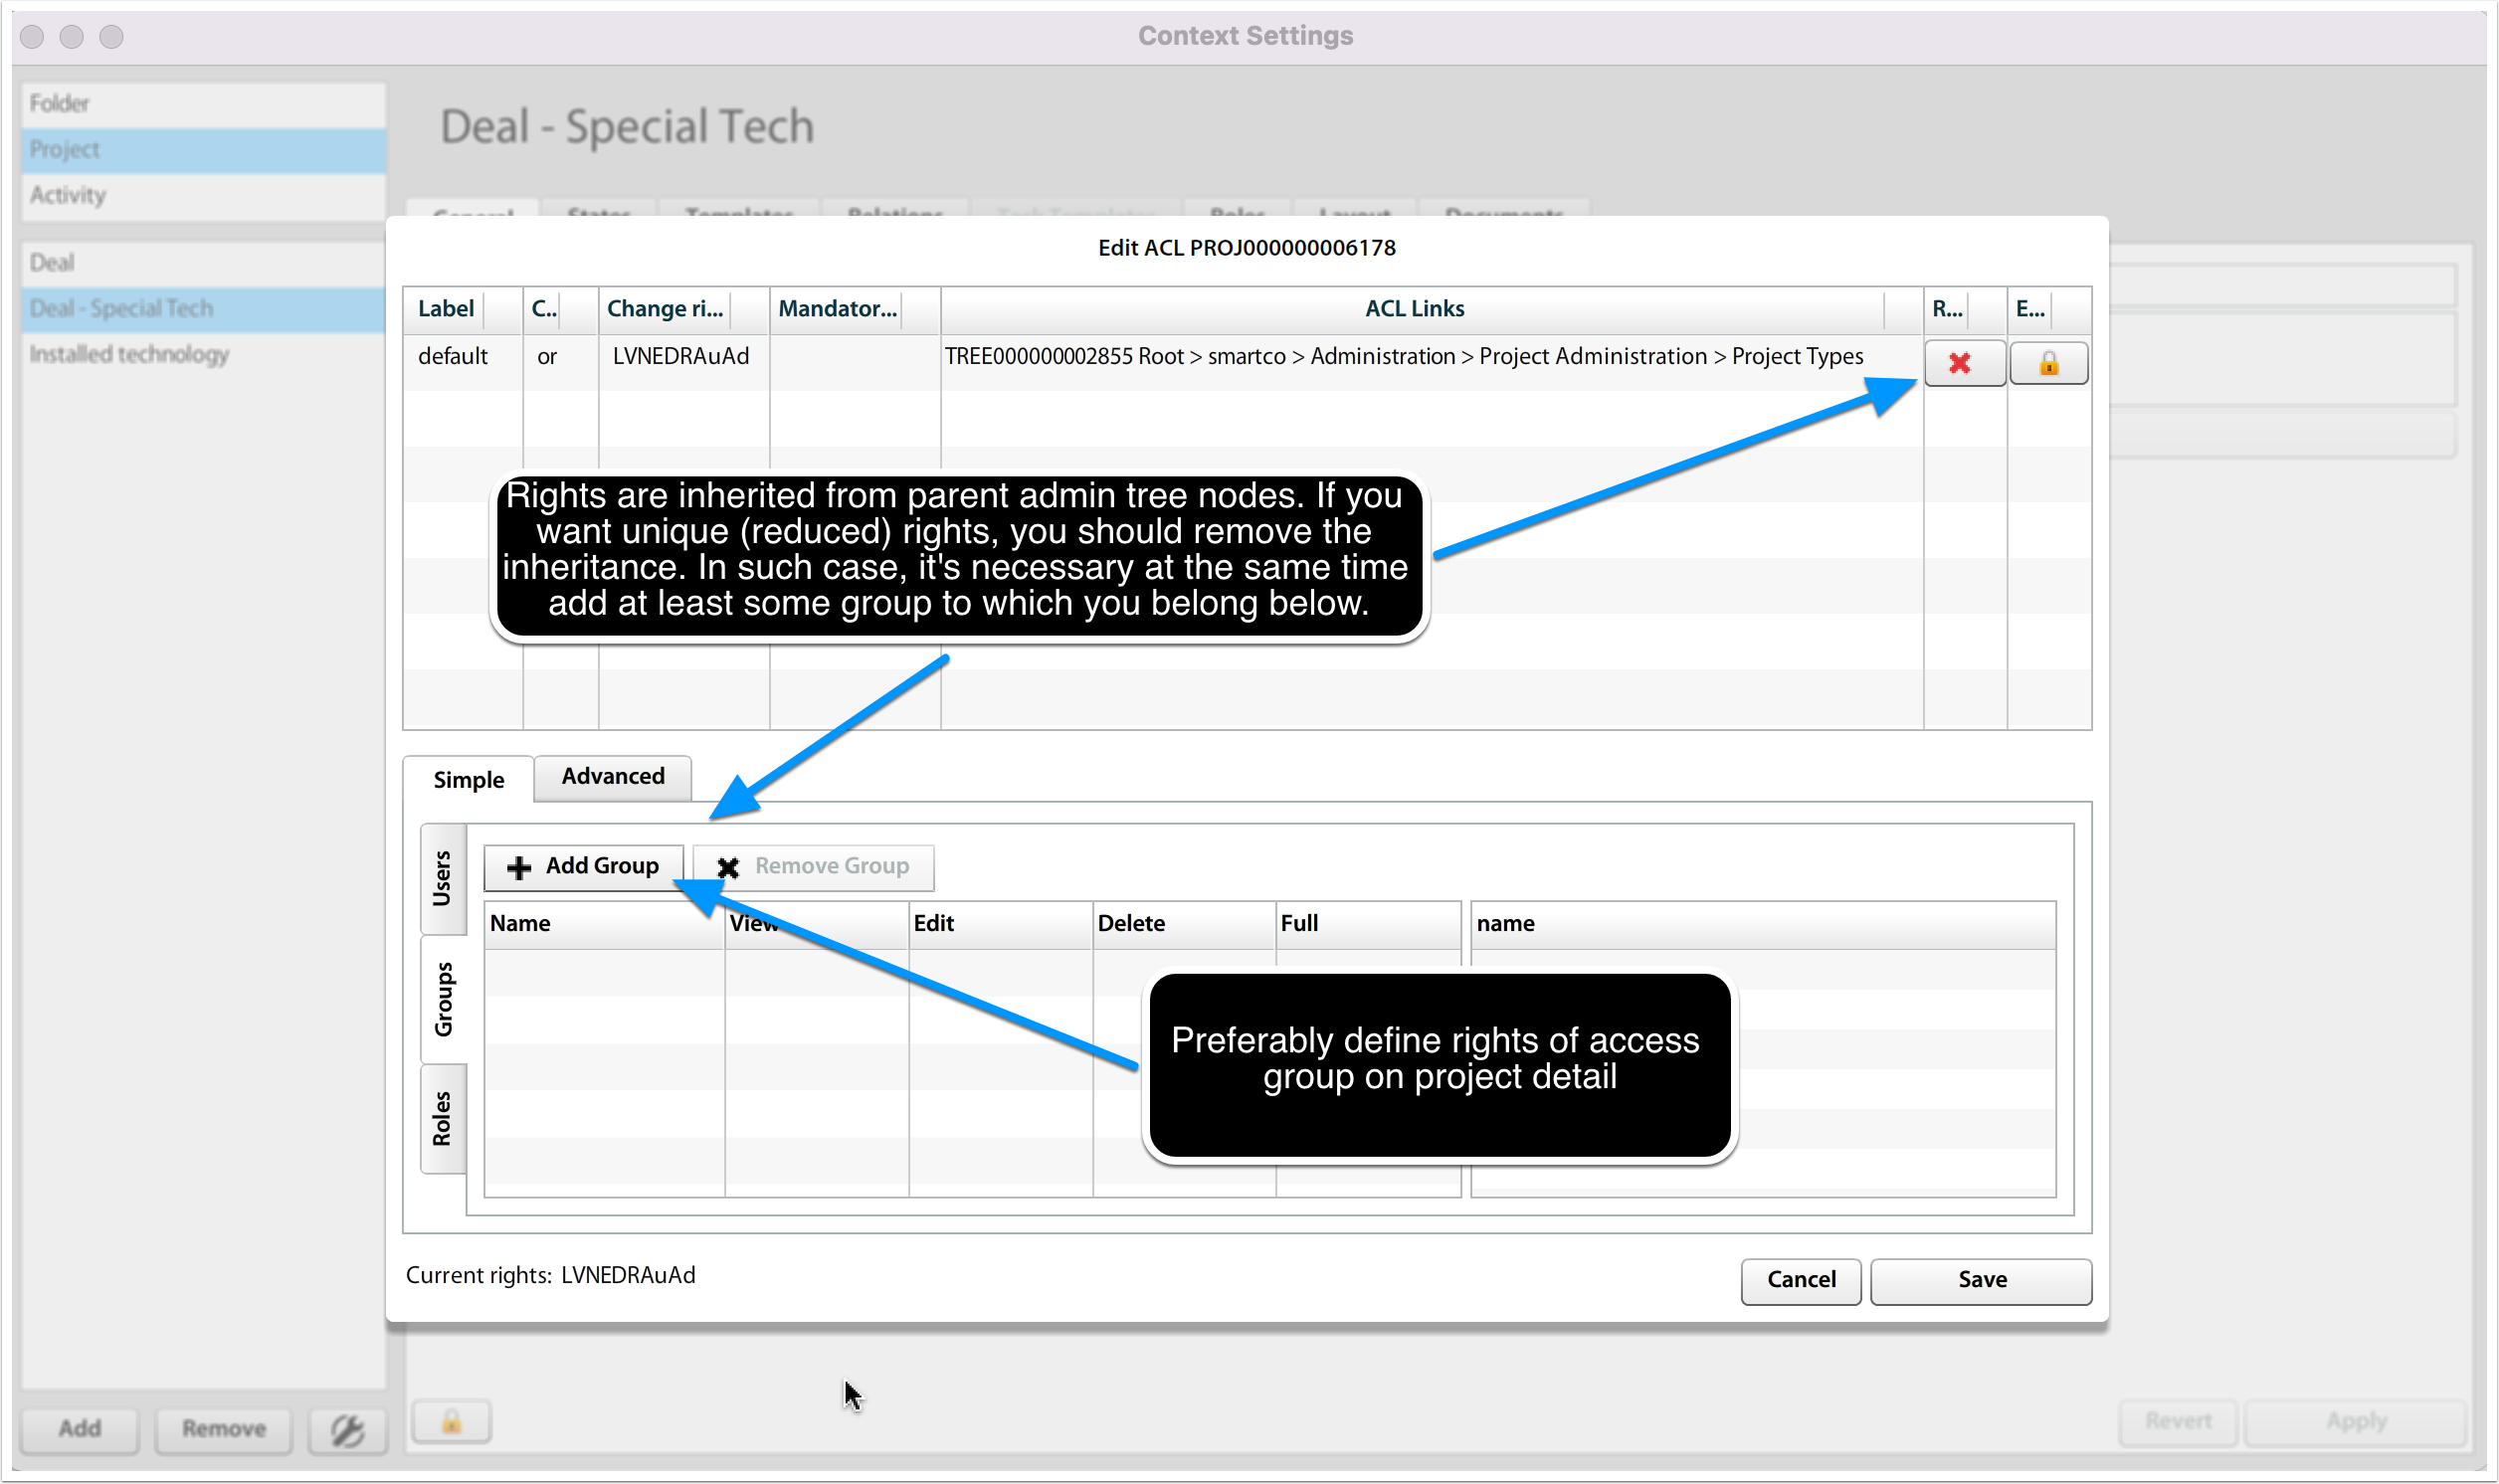
Update project type rights
Project type rights have 2 sections - above you can find link to parent tree node, from which rights are inherited. At this moment, you can only add new rights (not reduce, if they should be reduced). You can check what rights are defined (and inherited) following route using the key icon.
If you want to reduce (not add) rights, you should remove the inheritance (press on red delete button).
Before you save new rights, you should add group that will keep access to project type. You may keep group Administrators to have full rights.
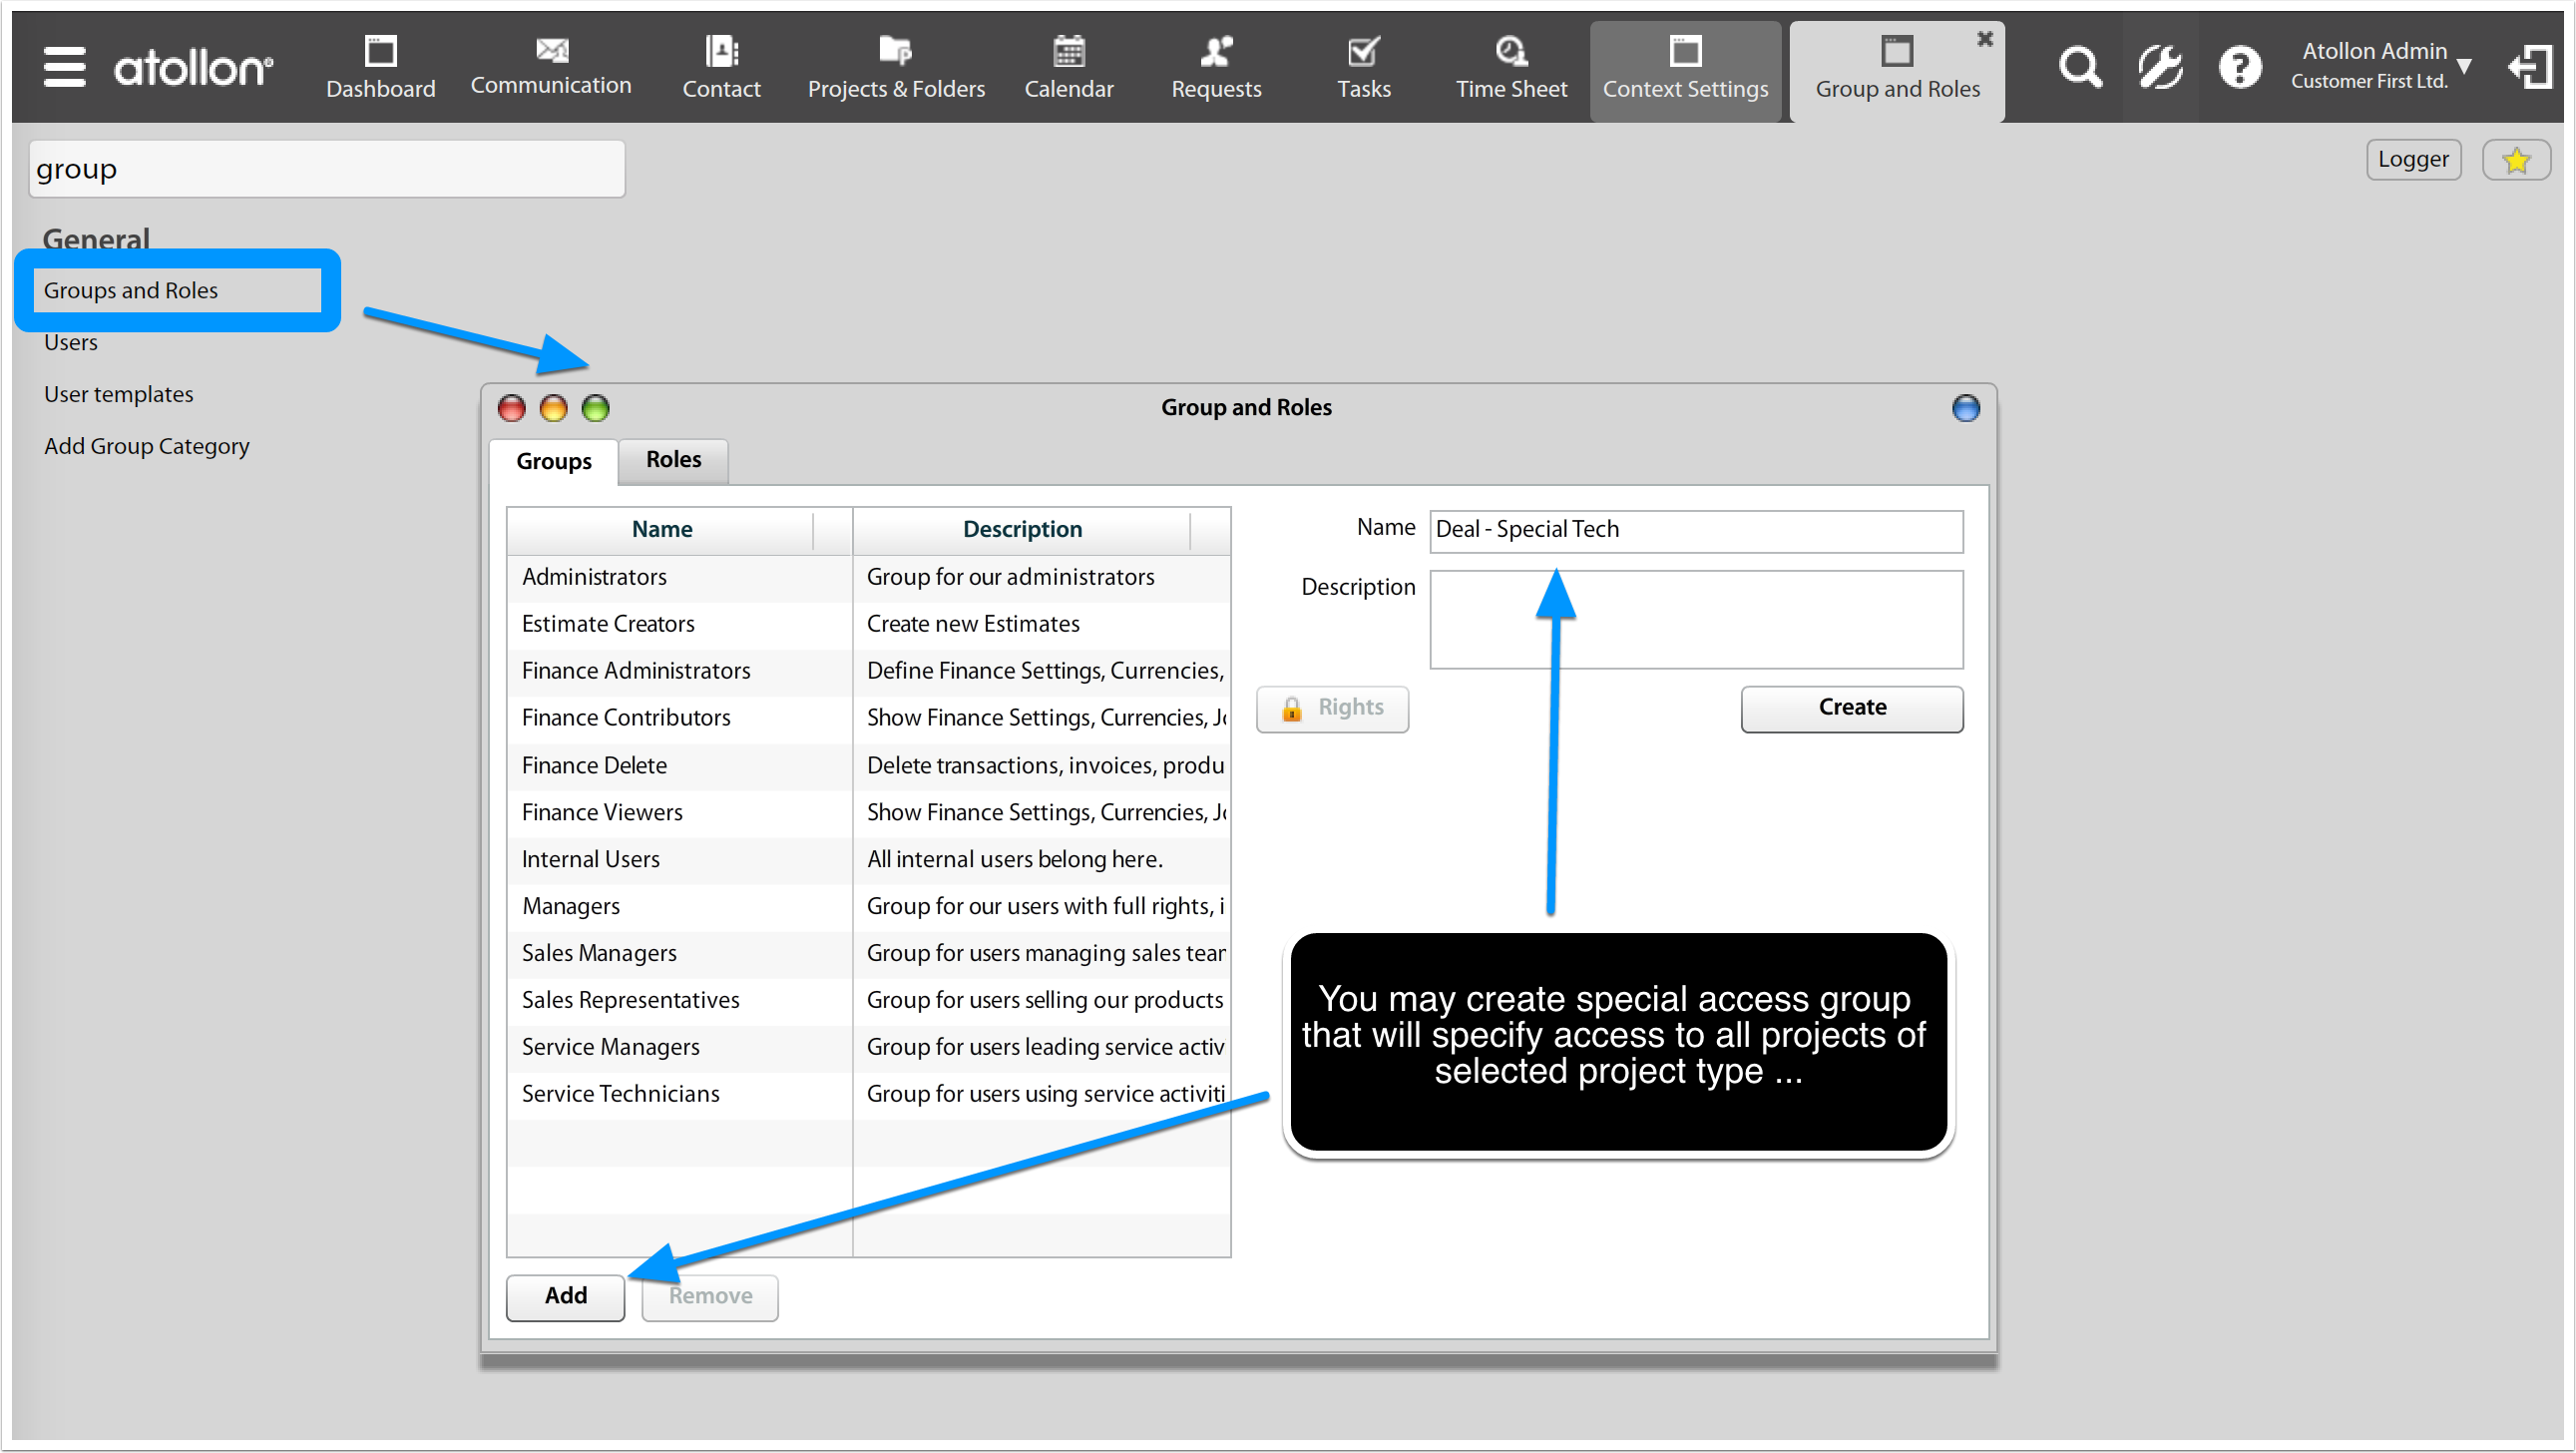
Create special group of users with access to project type
If you want group of users have access to the project type, you may want to create the access group first.
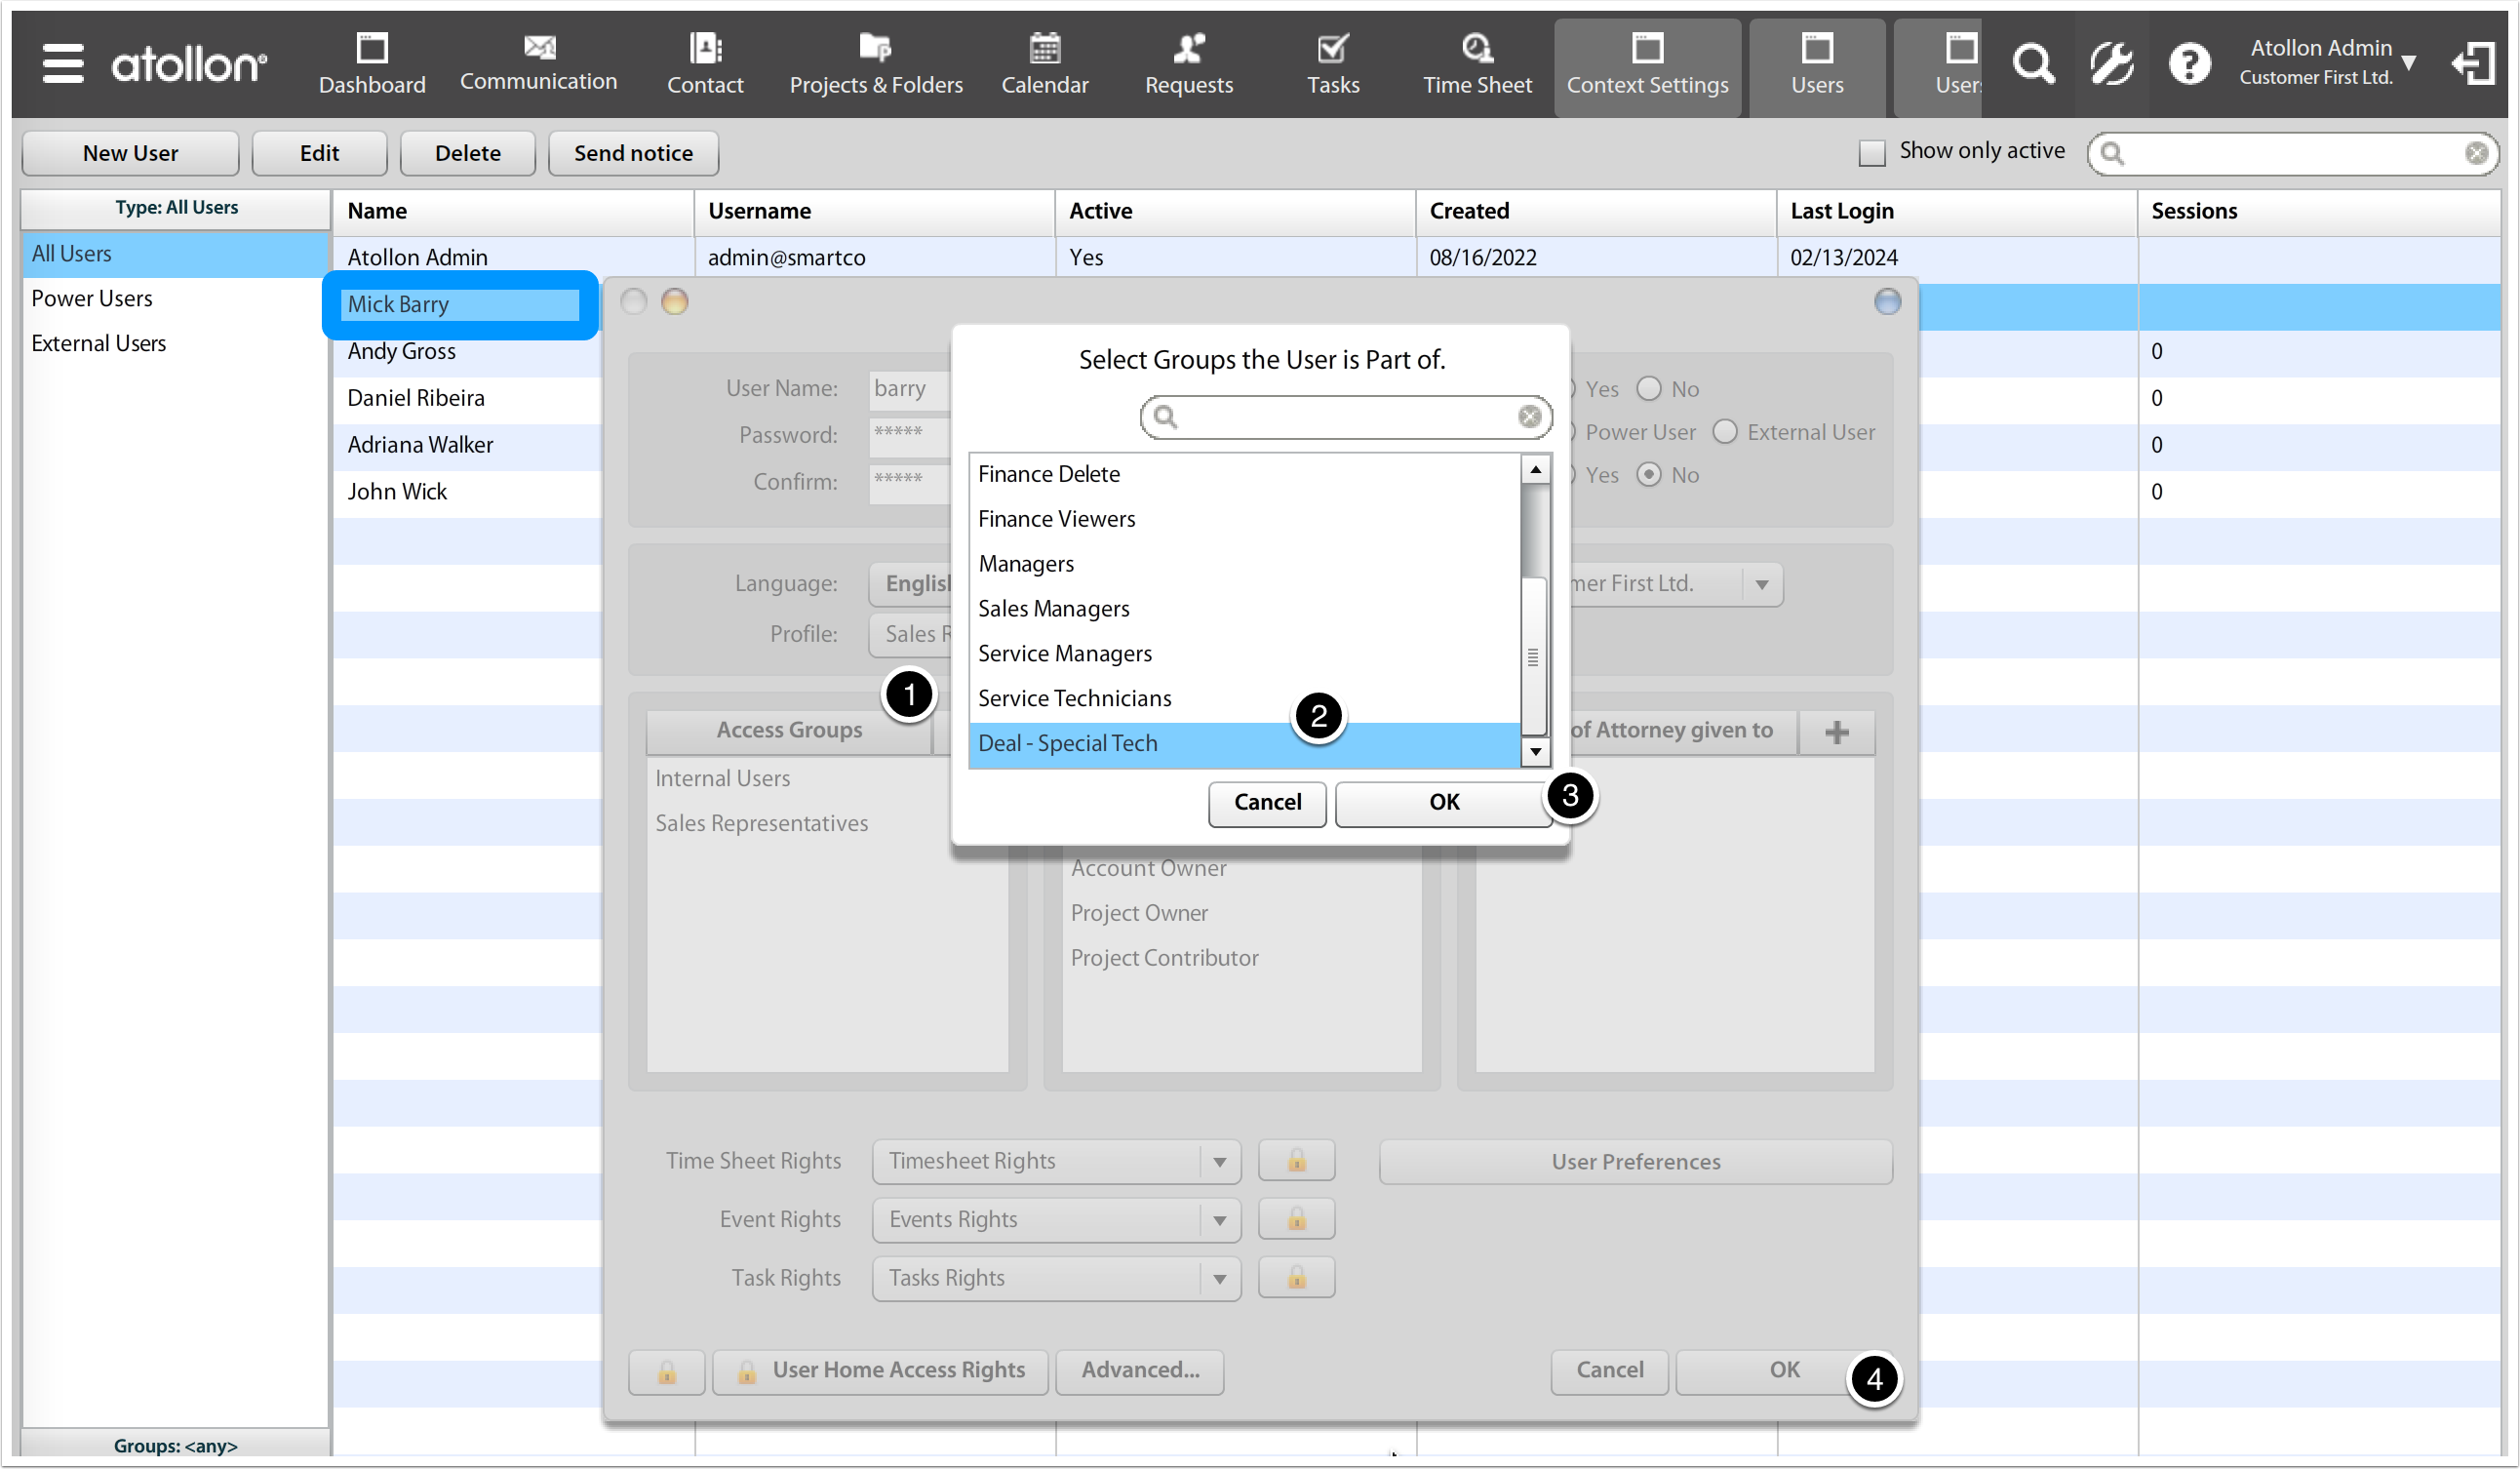
Add user to group
Users are added to the group by updating the Access Groups section in User settings.
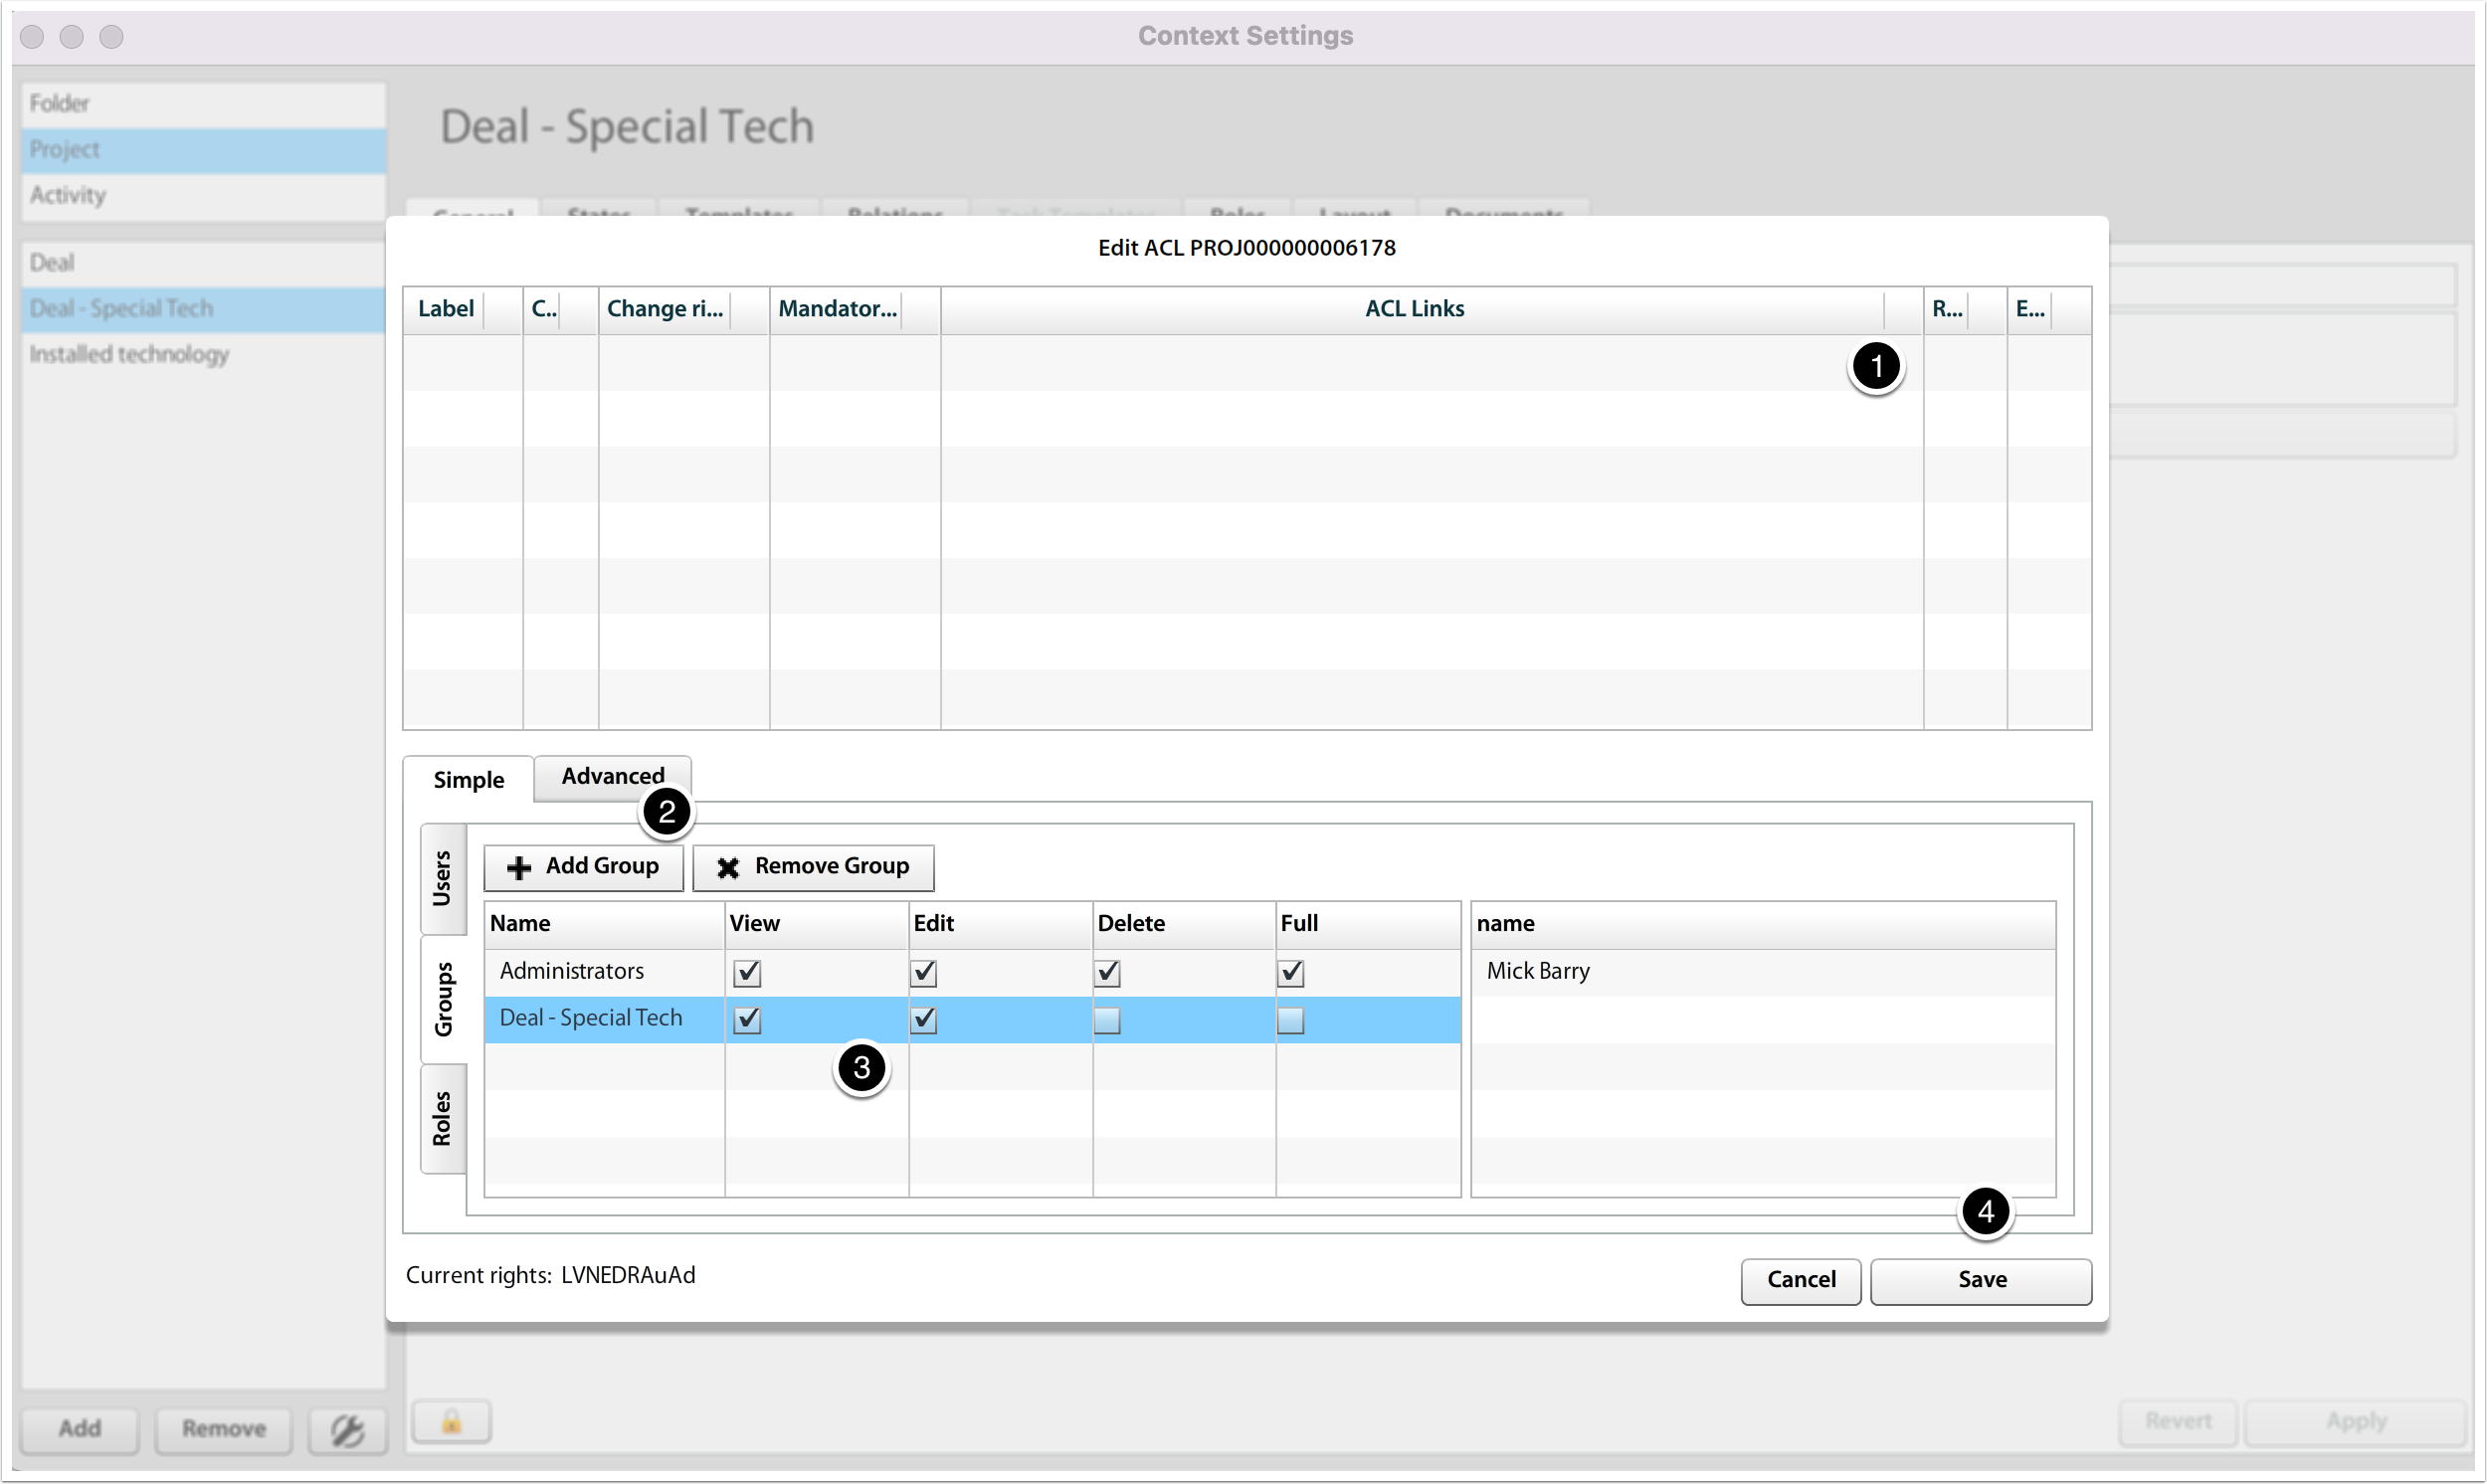
Adjust project type rights
If necessary, remove inheritance (top section). Add new groups that should have access to projects based on this project type. Administrators should have full rights, regular users might not have all rights (ie it is advised regular users are not able to delete (communication) from the project.
Adjust project template rights
Repeat steps above to adjust also project template rights. Now the project template rights stand separately (are not inherited from project type). This may change in future Atollon releases. Until that is changed, you need to do this setting manually once again.