Issued Invoices
Create New Invoice
Below is the explanation of ad-hoc invoice creation. If you want to explain Time Sheet invoicing, go to Time Sheet help. If you want to explain more complex billing, go to Billing help.
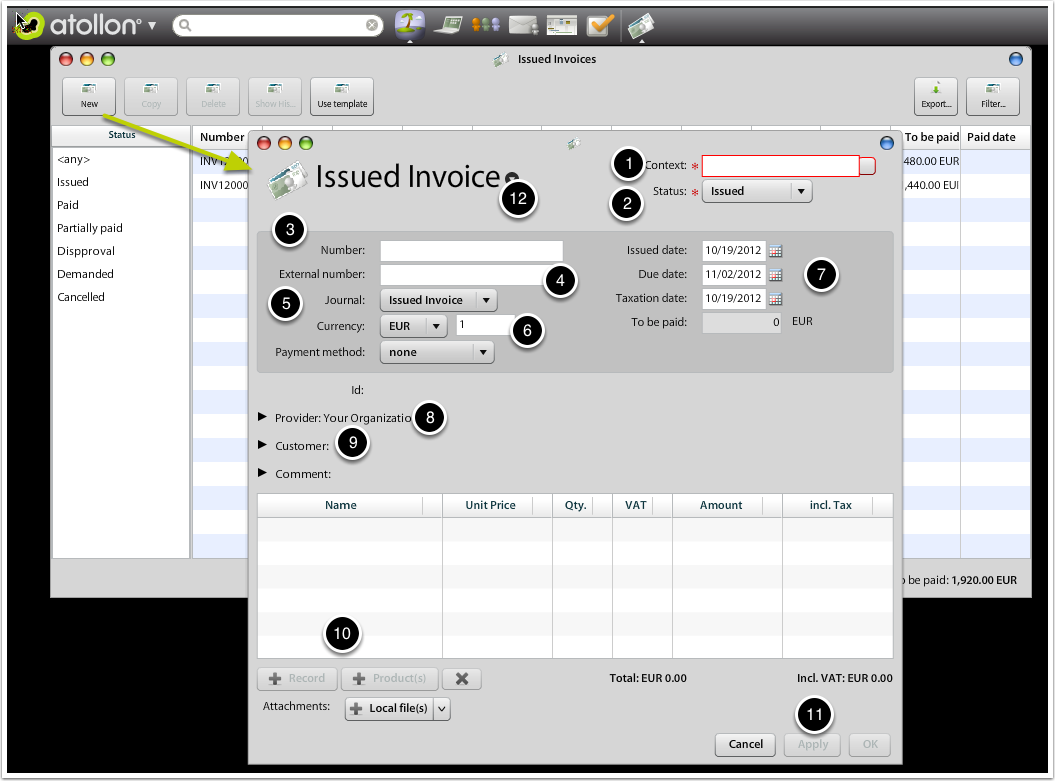
There are several steps to be done to create new invoice.
- Select Context (Folder > Project)
- You don't need to change Status. You may want to change it after it's approved / paid, etc.
- The Invoice Number is entered by system automatically after saving the Invoice
- External number may be (for example) No. of customer's order
- Journal: specifies analytical accounts for reporting as well as Serial Numbering
- Currency & exchange rate - they may be uploaded by system based on preset Taxation date
- Dates may be freely adjusted, but Taxation date must fit Finance year (you may set the restriction in Finance Settings - MS Win client)
- You may change Provider of the Invoice to different organization
- You may select Customer from existing clients or partners
- You may add one particular Record, free-form record or Product (or Service)
- You should Apply to save the Invoice
- The Invoice context menu will allow you to Print the Invoice
Add New Invoice Record/Transaction
On Invoice detail, press button Add Transaction.
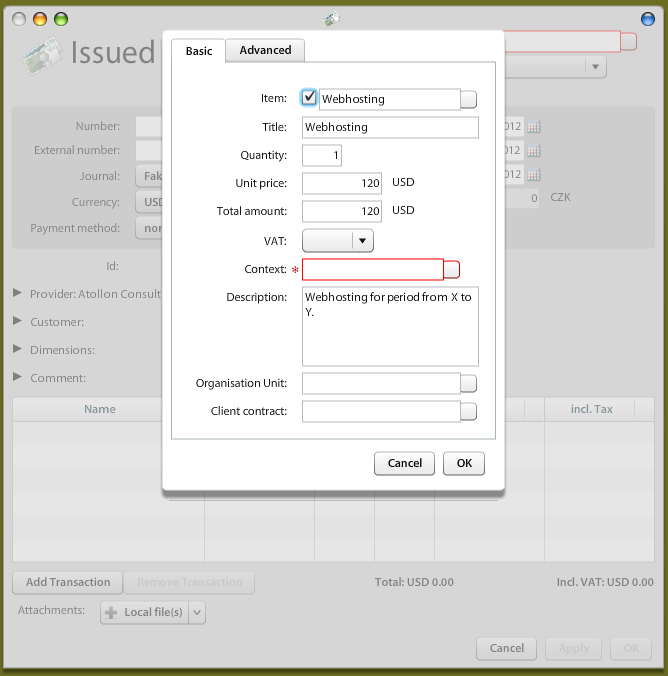
The Transaction details allow you to enter free-text record, Unit Price, Quantity & confirm. Context (Project) is required.
Optionally, you may enter also the following fields:
Dimension1, 2, 3: Any cost centre (such as Organization Unit, Team, Location) used to categorize the transaction. The cost centre should be defined in Dimension Settings.
Print Invoice
In order to print invoice, you have several options. You can either print it from the browser using HTML preview, you can store the printout as PDF into the project folder or you can send the invoice as PDF attachment in e-mail.
This option displays the printout in browser. You can print it directly to the printer from browser (using Ctrl+P on MS Windows or Cmd+P on Mac OS X).
It is necessary to adjust browser print options in order to preserve optimal output on the printer.
Print to PDF
This option is available only for specific print template, usually not used for invoices. Print template must be adjusted (Convert to PDF button must be added) in order to support this feature. This feature is used mainly in two-step printing process, in which users may fill-in additional content into form fields, before the actual print is generated.
Save PDF in context
This option generates PDF document on server side and stores the print as PDF file into the (Project) Folder. The name of the file is indicated in the print dialog and may be changed before the print.
Send PDF by email
This option generates PDF document on server side and opens new E-mail window with the printout attached in the form of PDF file.
Export Invoices
In case you want to export invoices, just browse to Invoices Issued (Received...), filter for what you want to export and press on Export button.
You can export to CSV in selected encoding (UTF-8 is recommended), XLS and HTML formats.
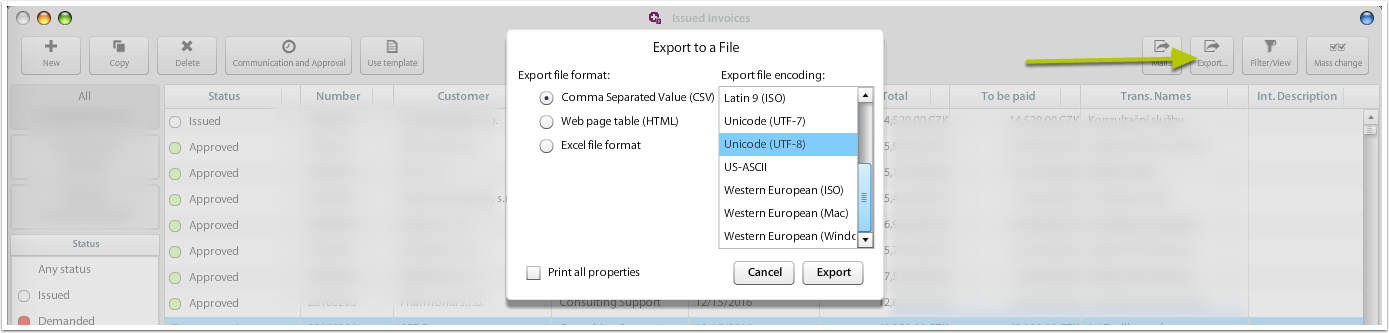
Option "Print all properties" exports all data (without this option only shown columns are exported).