Project Billing
In order to send invoices to your clients, you may collect source data for invoicing from Atollon Octopus Billing tool.
Billing tools allows Project Managers revise what Billing Items are ready to be billed and send them for billing.
Select what project Billing Items should be invoiced
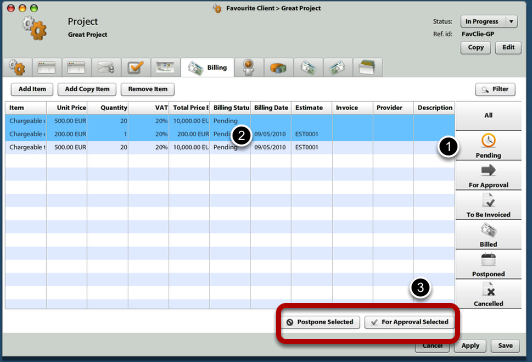
Once Project Manager finds out that some of the Billing Items should be invoiced, he/she should open the project, and:
1.) Select what Billing Items are Pending
2.) Select what Billing Items should be invoiced (or sent for Approval)
3.) Click on For Approval Selected (All) button
Approve Billing Items for invoicing
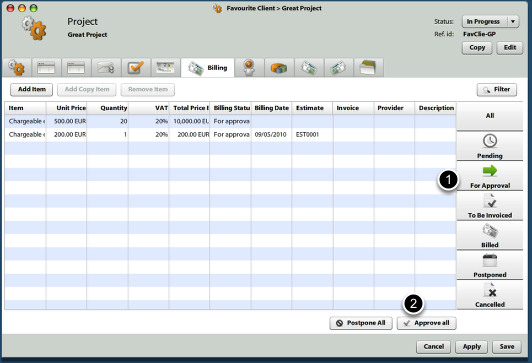
Revise whether project Billing Items are ok for invoicing. If they are, submit them to be invoiced.
1.) Select For Approval items
2.) Click on Approve all (selected) button
Invoice approved Billing Items: Open Billing
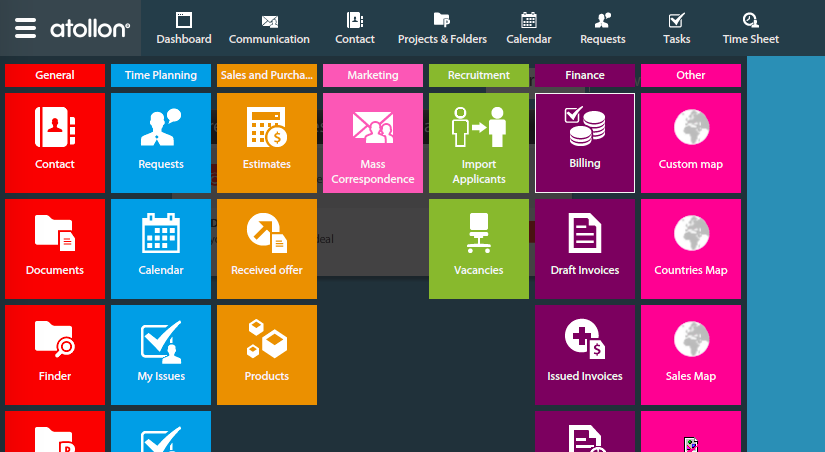
First open Billing application.
Billing application is used to revise and invoice Billing Items.
Invoice approved Billing Items: Select client / project
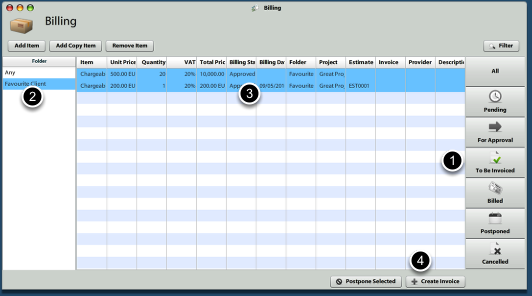
In order to select Billing Items for invoicing:
1.) Select To Be Invoiced button
2.) Select which client (folder) you would like to be invoiced
3.) Select all items you would like to invoice
4.) Press Create Invoice button
Revise & Submit the created Invoice
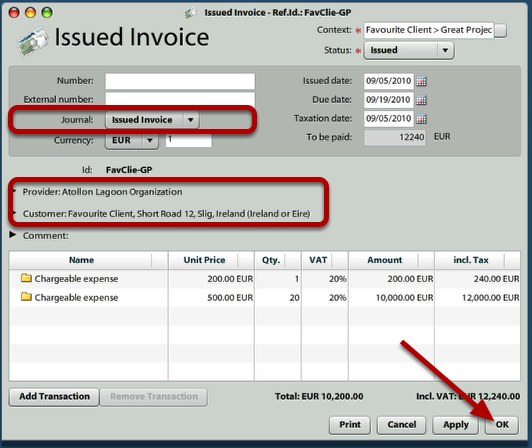
Once you clicked on Create Invoice button in previous step, new Issued Invoice is generated. You should revise all information pre-generated by the Billing tool.
Information such as invoice Journal, Provider and Customer may be automatically pre-filled differently based on Invoice Settings on project. Please see the step below to change these project Invoice Settings.
Once you click on Ok, the invoice is generated.
If you want to directly send / print the Invoice, press Print button.
Adjust project Invoice Settings
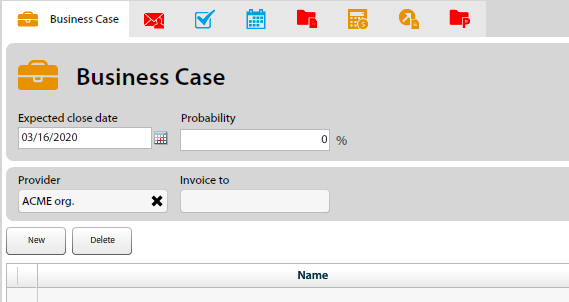
If you want to adjust Invoice Settings on particular project, open the "Deal" tab project and adjust Provider / Invoice to contacts. These are optionally allowed / disallowed in Layout settings of Project (in Context Settings).
Please note that these values may be also adjusted in Project Template settings to make creating & setting new projects easier.

